I’ll admit it: my first pair of pruning shears cost about the price of two coffees, and it showed. They crushed stems more than they cut them, the handles pinched my palm, and my poor basil looked chewed rather than trimmed. If you’re shopping for pruning shears for beginners, learn from my mistakes: the right pair makes gardening feel effortless, and the wrong pair can quietly ruin your plants.
Shears — also called secateurs or hand pruners — are the tool you’ll reach for most in a small garden. Deadheading flowers, pinching back leggy basil, snipping herbs for dinner, cutting back dead stems in autumn: nearly every plant task passes through these blades. Kitchen scissors work until they don’t, and then you get crushed stems that rot instead of healing. This guide covers choosing your first pair, making a clean cut, and keeping the blades sharp for years.
Quick Tips:
- Beginners should buy bypass shears, not anvil — they make cleaner cuts on living stems.
- Cut about 6 mm (a quarter inch) above a bud or leaf joint, angled slightly away from it.
- Wipe the blades clean after every session, and disinfect between plants if any look sick.
- Sharp blades are safer than dull ones — a sharp pair needs far less force.
Bypass vs Anvil: Why Pruning Shears for Beginners Should Be Bypass
Walk into any garden centre and you’ll see two kinds of shears, and the difference matters more than the price tag.
Bypass shears work like scissors: two curved blades slide past each other, slicing the stem cleanly. Anvil shears work like a knife on a chopping board: one straight blade closes onto a flat plate, and the stem gets crushed between them.
That crushing is why anvil shears are wrong for most beginner tasks. They’re fine on dead, dry wood, but on living stems they squash the tissue on both sides of the wound. I learned this on a leggy rosemary: stems cut with my cheap first pair — technically bypass, but so dull they acted like an anvil — developed brown, mushy ends that took weeks to seal. The same stems cut later with a sharp bypass pair healed in days and pushed out new growth below the cut.
Beginners cut living plants about ninety percent of the time — herbs, flowers, houseplants, green stems. So the rule is simple: buy bypass. Nearly every guide to pruning shears for beginners starts with the same advice, and it’s the advice I wish someone had given me before I bought that first pair. Shears sit at the top of my guide to the gardening tools beginners actually need, if you want the full toolkit picture.
What to Look For When You Buy Your First Pair
You don’t need to spend a fortune. The best pruning shears for beginners sit in the mid range — roughly the cost of a large bag of potting compost — but a few features decide whether they feel like a pleasure or a chore.
Blade steel
Most shears use high-carbon steel or stainless steel. High-carbon takes the keenest edge and holds it longest, but rusts if left damp. Stainless shrugs off moisture and is lower maintenance, though it needs sharpening a touch more often. For a beginner who might forget to dry the blades after a rainy session (we’ve all been there), stainless is the forgiving choice. Either way, look for a sap groove — the thin channel that stops sticky sap gluing the blades together. Cut one sappy tomato stem and you’ll understand.
Comfort and grip
You’ll hold these for hundreds of squeezes, and handles that dig into your palm turn a ten-minute tidy-up into a hand-cramp. Try them in the shop like shoes: open and close them a dozen times. They should feel smooth and cushioned, with a spring that pops them open without a fight. If you have small hands — as I do — look for pairs labelled compact, or with a narrower handle spread; standard handles force small hands to over-extend, which is tiring and imprecise.
A safety lock you’ll actually use
Some locks are fiddly wire loops needing two hands; others are a simple thumb-slide. Test it in the shop — if it’s awkward, you’ll never use it, and open shears bouncing around a tote bag is how accidents and nicked blades happen. It should click shut one-handed.
Replaceable parts
This separates a two-season tool from a twenty-year one. Cheap shears are riveted: when the spring snaps, the whole thing goes in the bin. A good pair comes apart with a screw, and the spring, blade, and hook can all be replaced for very little. Mine is seven years old, on its second spring, and cuts like new — far cheaper than replacing a throwaway pair every other year. You don’t need spares now; just check they exist.
How to Make a Clean Cut
The cut is a small ritual, and getting it right separates pruning from hacking:
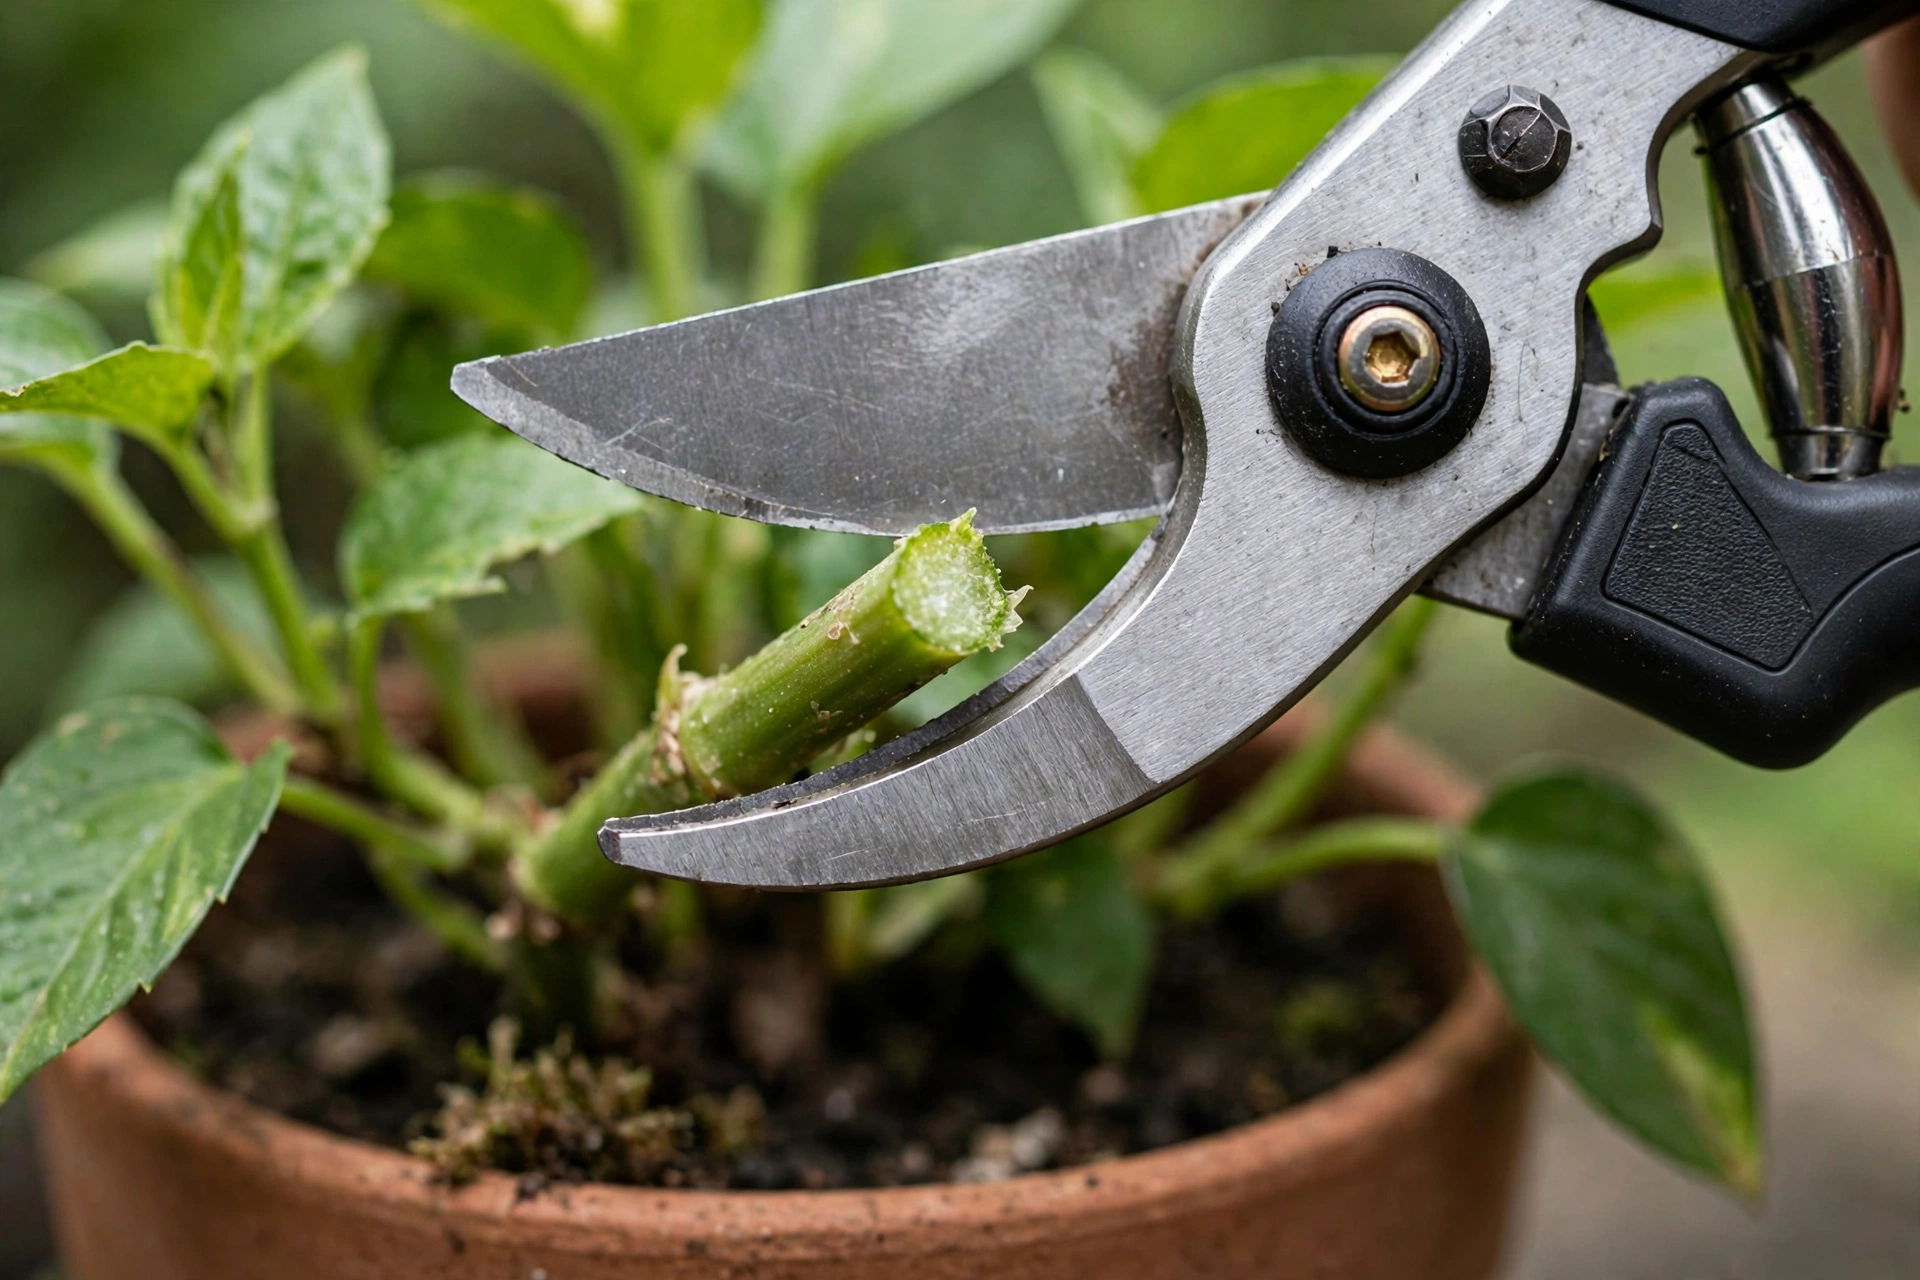
1. Pick your spot. Cut about 6 mm — a quarter inch — above a bud, leaf joint, or side branch. That stub is intentional: flush cuts risk damaging the bud, and long stumps invite rot. Want outward growth? Choose an outward-facing bud.
2. Angle the blades. Tilt so the cut slopes gently away from the bud, about 45 degrees. The slant sheds water off the wound instead of letting it pool — pooled water invites fungal problems. It needn’t be exact; a shallow slant is the whole trick.
3. One firm squeeze. Seat the stem deep in the blades, near the pivot where force is strongest — not out at the tips. Then squeeze once, firmly. Hesitant half-squeezes crush stems: the blades bite partway, the stem twists, and you chew through it. Commit to the cut. Once you’ve done it five times, using pruning shears for beginners feels completely natural.
A clean cut looks like a smooth, pale disc; a crushed one looks ragged and stringy. Check your first few cuts — your plants will show you the difference within a week. And when you can, cut in the morning on a dry day: wounds seal faster in daylight and airflow, and wet foliage spreads disease more easily.
What NOT to Cut (and the Mistakes That Damage Shears)
Shears have limits, and beginners usually discover them by breaking something. Keep the blades away from:
- Branches thicker than 2 cm (3/4 inch). If you’re straining with both hands, it’s too thick — forcing it springs the blades out of alignment. Thick branches need loppers or a pruning saw.
- Wire and plant ties. A wire tie hidden in foliage is a classic way to chip a blade. Snip ties off with old scissors first.
- Twisting mid-cut. If a blade sticks, don’t twist to free it — open the blades and reposition. Twisting bends the edge out of true.
- Roots and soil. Shears are for stems, not root balls. Soil grit dulls blades fast. When repotting a plant step by step, use fingers or an old knife on roots and save the shears for the tidy-up trim.
- Rushing. The most damaged shears I know belong to a friend who prunes at dusk, one-handed, holding a watering can in the other. Slow down.
Cleaning and Disinfecting Between Plants
This lesson cost me a plant. One spring I pruned a rose with black spot, then moved straight to a healthy clematis with unwashed blades. Two weeks later, the clematis had spots too. Blades carry fungal spores and bacteria between plants — cleaning isn’t fussiness, it’s hygiene, and it’s the part of pruning shears for beginners care that most people skip.
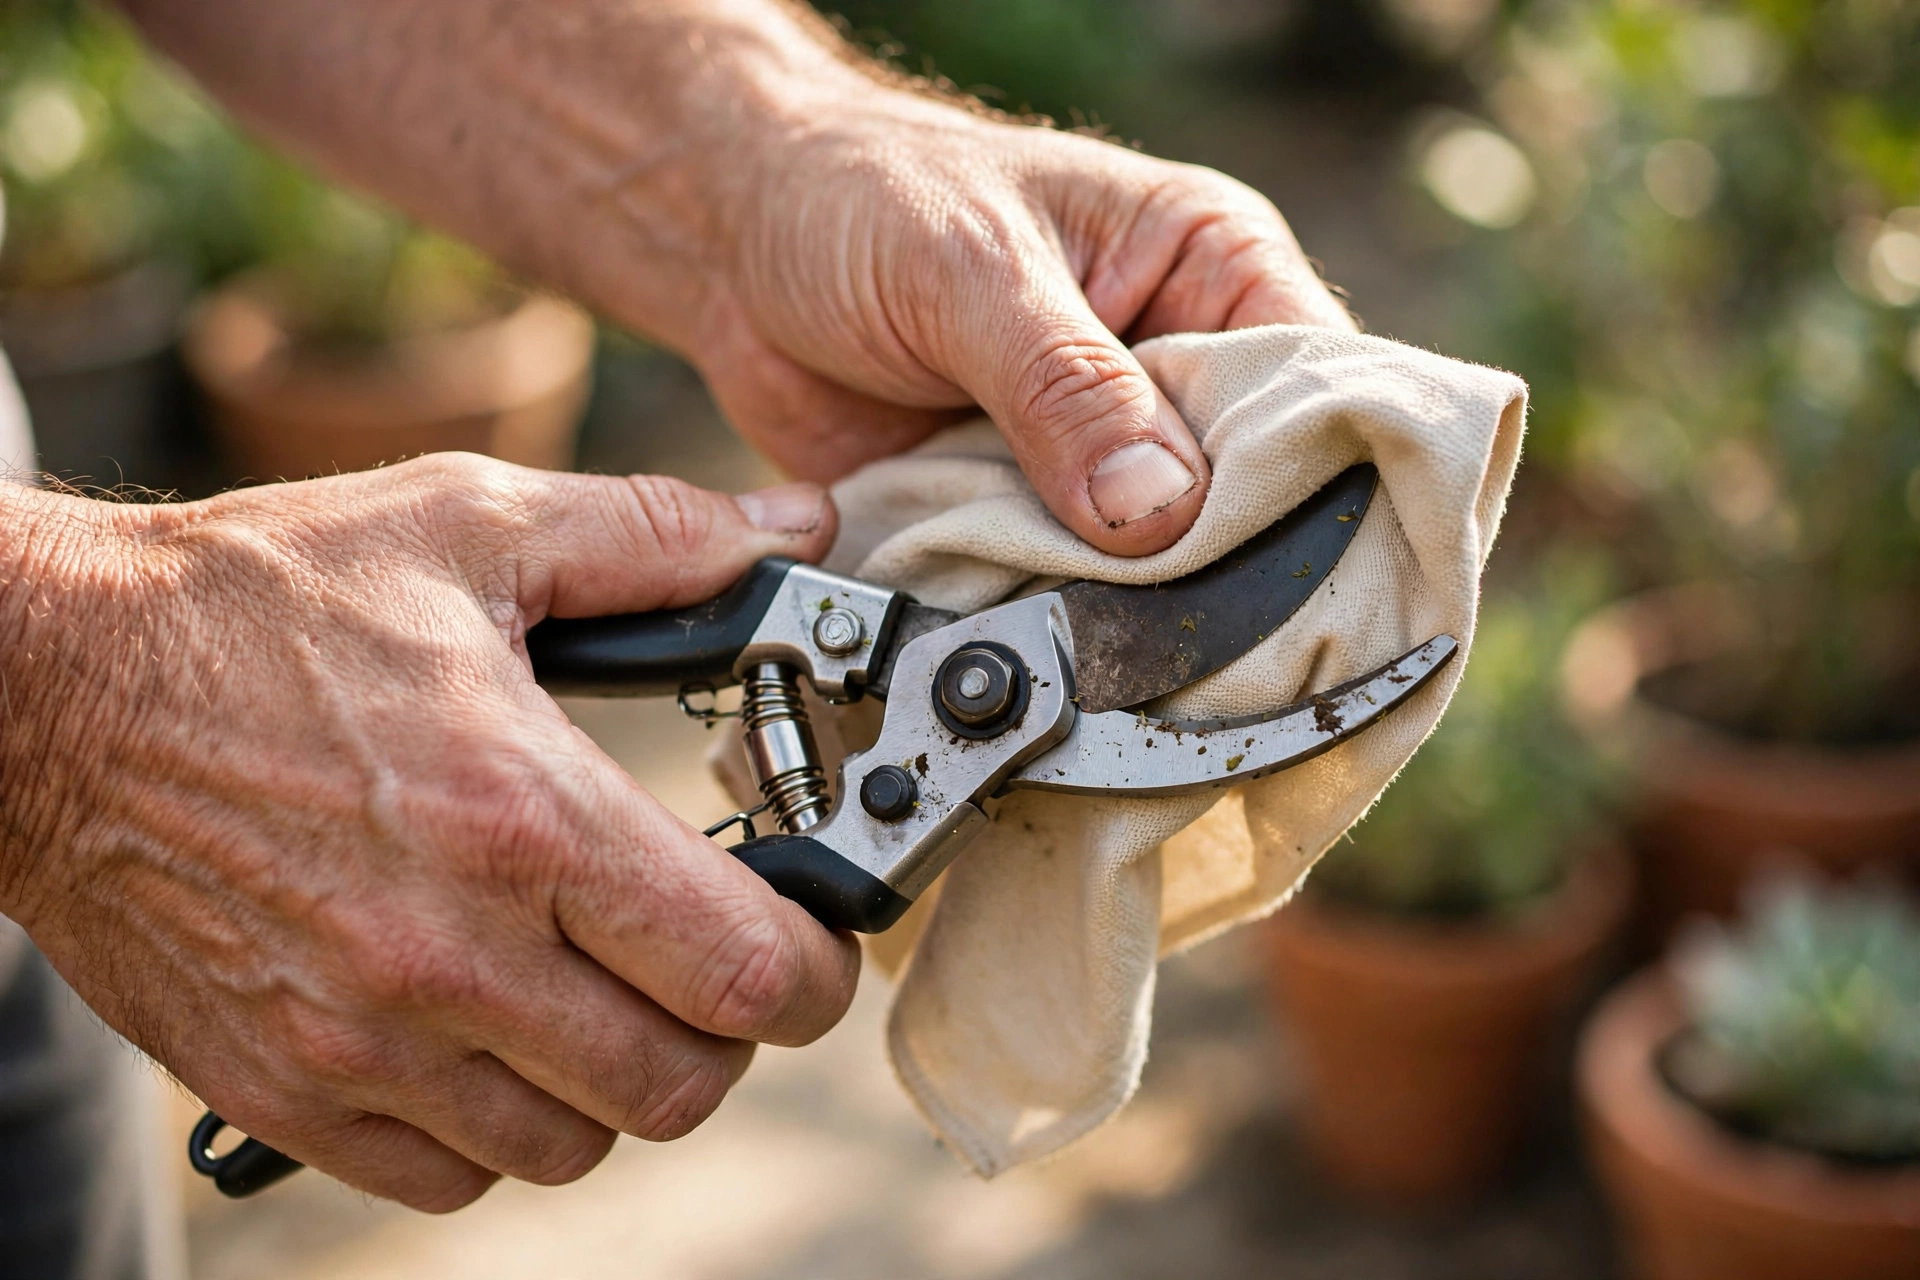
After every session: wipe both blades with a damp cloth to remove sap and residue, then dry. Leftover sap turns gummy, makes cuts stick, and eventually pits the steel. Thirty seconds, and it genuinely doubles the life of your edge.
Between plants, or when you spot disease: disinfect. A wipe or spray of rubbing alcohol (70% isopropyl), left a few seconds, then wiped dry — that’s all it takes. Diluted bleach (1:10) works too, but rinse afterwards because bleach corrodes steel. I keep a small spray bottle and a rag in my tool tote; moving from a sick-looking plant to a healthy one takes a five-second spritz, and it’s saved me more than one plant since the clematis.
If you spot pests or suspicious spots while pruning, don’t just snip and move on — the guide to common houseplant pests and natural remedies helps you treat the actual problem, not just its symptoms.
Sharpening Basics
Dull shears don’t just cut badly — they’re dangerous. A dull blade needs twice the force, slips more easily, and crushes what it should slice. Sharpening is also where pruning shears for beginners ownership gets quietly satisfying: five minutes, and they cut like new.
You need a small diamond file or whetstone — pocket-sized garden ones cost very little. Open the shears and work only the bevelled side of the cutting blade. Draw the file along the bevel in one direction, base to tip, following the existing angle — about ten steady strokes. Flip and give the flat back one or two light passes to remove the burr. Wipe clean, test on a twig: it should slice, not chew.
For a balcony gardener pruning weekly, a touch-up every month or two is plenty — you’ll feel when it’s due. And don’t file the flat side aggressively: I once sharpened both sides like a kitchen knife and ruined the edge geometry. Bevel side only; the flat side gets a whisper.
Oiling and Storage
After cleaning and drying, put one drop of oil on the pivot screw and work the handles a few times. Camellia oil is traditional; ordinary household oil works, and olive oil does in a pinch. It keeps the action smooth and the pivot rust-free — just wipe off the excess so it doesn’t attract dust.
Lock the blades closed and store them somewhere dry — not a damp balcony corner or the bottom of a soggy tote. A wall hook, dry shelf, or tool roll all work. Mine hang on a nail inside a storage box by the door. Each autumn, give them a final clean, oil, and sharpen before their winter rest, and they’ll greet spring ready to work.
Pruning Shears FAQ
A few questions I hear a lot about pruning shears for beginners:
Can I use them on houseplants?
Absolutely — pruning shears for beginners handle houseplant jobs beautifully: trimming leggy pothos, removing yellow leaves, taking cuttings — all cleaner with shears than fingers. Just wipe the blades between plants, especially if one looks unwell.
Do I need left-handed shears?
Most shears are right-handed, with the cutting blade on a specific side. If you’re left-handed, seek out pairs marked ambidextrous or left-handed — a right-handed pair in a left hand hides exactly where you’re cutting. Try before you buy if you can.
How often should I disinfect?
Wipe clean after every use; disinfect between plants whenever any plant shows disease — spots, cankers, unexplained wilting. In a big session with healthy plants, a quick spritz between each plant still takes only seconds.
Can I use a kitchen knife sharpener?
Not ideal. Pull-through sharpeners grind both sides at a fixed angle, ruining the single-bevel geometry of bypass blades. A small diamond file on the bevelled side only is cheaper and does it properly.
Your Turn to Snip
A good pair of shears is one of those rare purchases that changes how gardening feels. The first time you make a clean cut and watch the plant seal it and push fresh growth, you’ll understand why gardeners get oddly attached to their secateurs. Choose bypass, keep them clean and sharp, and the pruning shears for beginners you buy today could still be cutting a decade from now.
Now go deadhead something. Your plants will thank you.